


This post was sponsored by DecoArt, but the opinions and clever quips are completely mine.
With the end of summer comes my favorite time of year I’ve affectionately dubbed “Craft Season.”
Fall and winter mean time for me to get my craft on! And wouldn’t you know, DecoArt just happened to release a new collection of paints and stencils this month. I was fortunate enough to become part of their blogger outreach program, and when the boxes landed on my doorstep, I had to check the calendar just to make sure it wasn’t Christmas! I received a ton of new paints from their Americana Multi-Surface Collection. They are awesome! They can go on any surface including wood, metal, plastic, glass (glass!), and many more. Americana Multi-Surface Satins are available for purchase at Michaels, A.C. Moore, Hobby Lobby, and other fine craft retailers.

This was a big day for us. The curiosity was killing me so we had to go check out the new DecoArt setup in Michaels. It was all there!


Not only did I receive lots of great paint, but the STENCILS too!
I now want to stencil everything in my house.
I sit around staring at objects and wondering which stencil would look best, which color combination I should use, and so on. I will have no lack of projects when the weather turns cold. All my friends will know what they are getting for Christmas.
For this project, I happened to stumble upon a great little easel on my last trip to Goodwill. I knew right away it would be mine.


My oldest daughter will be turning six next month. She loves to paint, but often gets frustrated when her three year old little sister mixes the paint colors in the little pots. Poor girl, she starts out with a colorful picture that slowly morphs to brown. So I thought for her birthday I would buy her her very own fancy watercolors. I found a great price on some artist brushes and paints at Ross.
Am I a crazy person for buying a six year old paint in squeeze tubes?I must have a deathwish.
I think (crossing my fingers and saying a prayer) she will take care of them. When I found the easel I was pumped because now all of her supplies will fit in the case. Plus her gift just got way better. Now she will have a personalized carrying case and I will go down as the best mom ever!
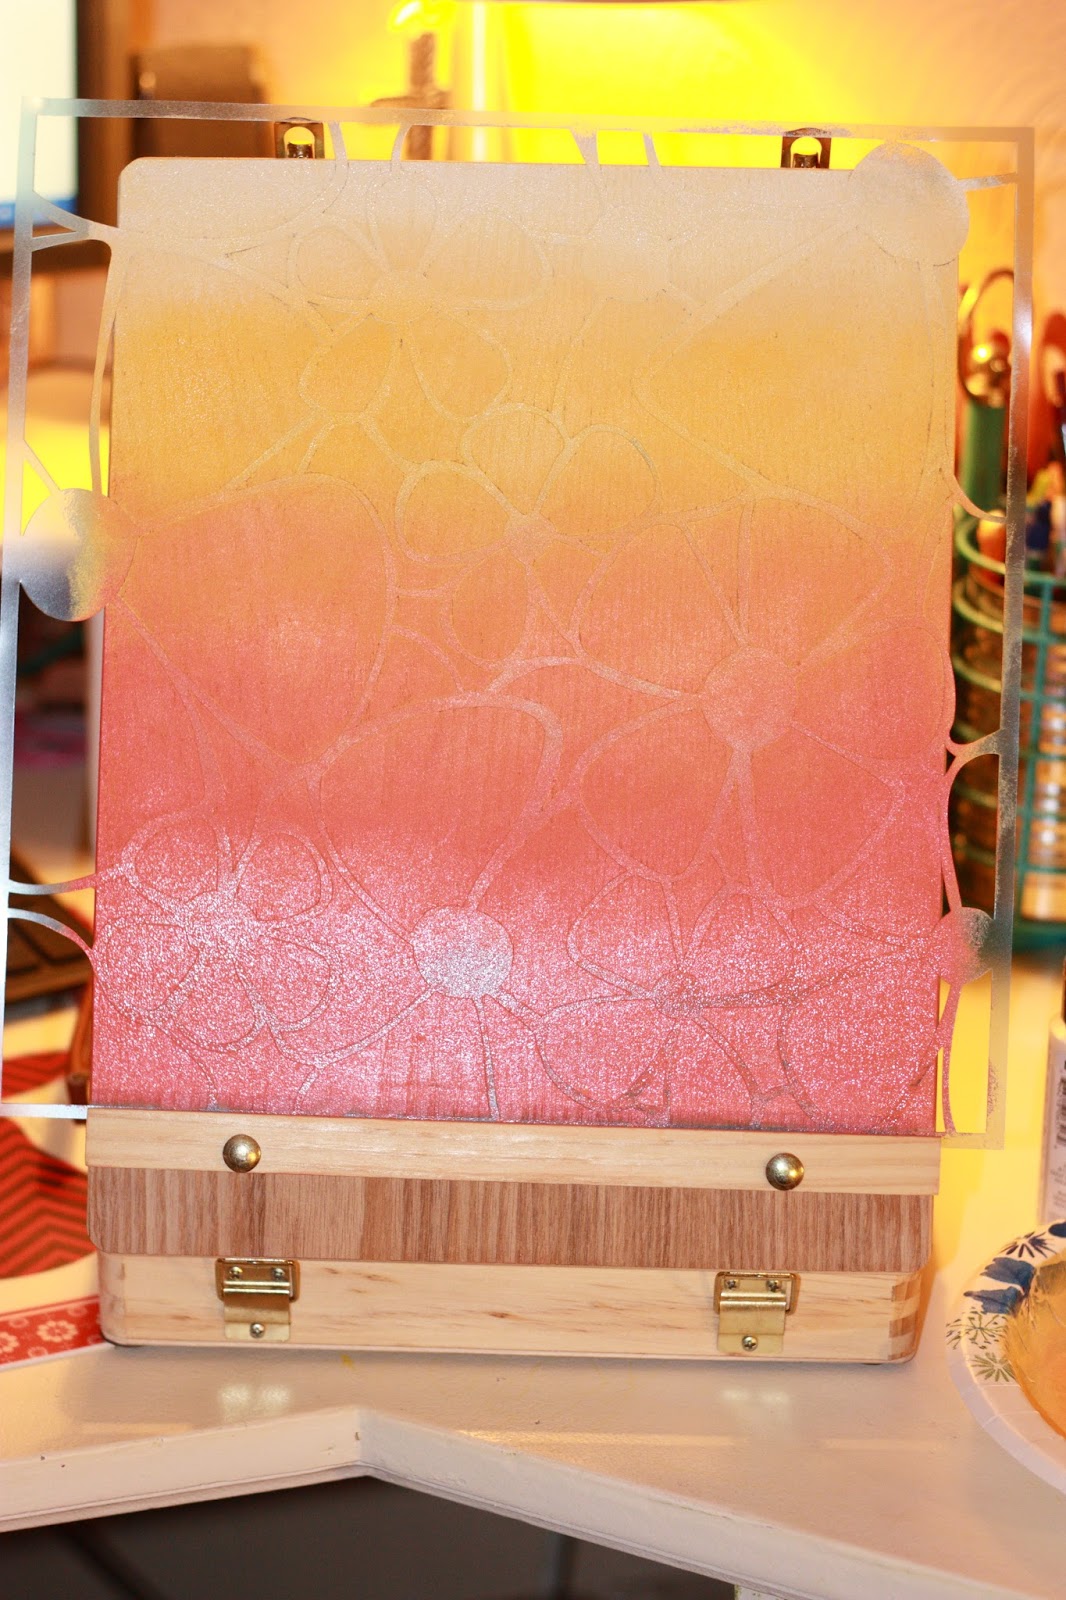
Stained Ombre Stencil Art
Materials list:
- For this project you will need a stencil of your choice. I used the Americana Mixed Media “Oopsy Daisy” stencil. DecoArt has a ton of really cool stencils that just came out in stores under their Americana line. They are ginormous at 12″x12″ size.

- You need paint colors in graduating shades to create an ombre effect. I wanted to begin with white, fade to yellow, and then orange, coral, and finally pink. I used the Americana Multi-Surface Satin paints in Flamingo Pink, Poppy Orange, Orange Sherbet, School Bus Yellow, and White Birch. I also used Turquoise Waters for the box sides. You can see their entire color collection here.

- Some Spray Adhesive to hold your stencil in place.
- Wood Stain. I used Minwax’s “Red Mahogany.”
- Sanding block For distressing.
- A clear coat sealer like polyurethane.
- I used a round sponge to apply my paints and stain and a paper plate for mixing.
This project is best for a wood surface, hence the sanding and staining. I would totally do this again with wood scraps to make a plaque or frame. This finish looks so great, I could put it on anything and never get bored.
Getting Started:
First, I used some Loctite General Performance Spray Adhesive. It is repositionable, but holds the stencil nicely in place while you are working. I gave the stencil a light spray and stuck it on the front of the easel box.

I squirted some paint on my plate and started pouncing it with the sponge to load the paint evenly. I need to invest in a nice stencil brush because it was a little tedious getting the paint into the deeper grains of the wood. I started at the top applying the lightest color, working my way toward the darker shades. First, I used this pretty cream color, when I had a nice inch or two colored, I added a little of the yellow to the cream paint and started overlapping the newly mixed color and extending it a few inches beyond. A rounded sponge will help blend the color so there are no harsh edges.

Slowly, I would add more of the color until I had solid coverage, and then I would transition to the next color. Pay attention to how many colors you are using and try to divide your surface evenly so that you will have enough space for each shade.

I also rotated my sponge so that when I needed to go back and fill in, my white area wouldn’t have orange or pink bleeding through.

I added the Orange, the Poppy, and finally worked my way to the Flamingo Pink. It was very light, but mixed with the Poppy shade, it gave a peachy glow. This took a total of two coats. I went over the surface twice to deepen the color and fill in the grain of the wood.


The cat could see what a good time I was having and had to come check it out.
Now time to remove the stencil!


It turned out great, however I had a few tiny spots that bled through. I used a wet Q-Tip to wipe away the excess paint and clean the lines. The spray adhesive definitely helped, had I not used it, I would have had a mess on my hands. It was perfect for a stencil like this with intricate cuts and fine lines when you factor in all the tapping and thrashing I was doing with my sponge.

While I let that paint completely dry, I decided to add more color around the edge of the box. I chose a contrasting shade called “Turquoise Waters.” I love turquoise, it’s my favorite color in the whole wide world! I painted two coats around the box.
Then I painted the little shelf that holds the canvas with the Flamingo Pink shade.
When everything dried, I got out the sanding block and used it to distress all of the edges. I also lightly sanded the entire stenciled surface to smooth out the transition from wood to painted surface.


The stain is a little tricky, as it can set up quick (so quick in fact, I could only get one crappy picture!) I used a sponge wedge to wipe the stain on, then I used a damp paper towel to remove it almost immediately and blend it over all the surfaces.

Work in a small area, don’t go slapping stain on the whole thing all at once. The wood just drinks in the stain, but the painted surfaces need to be wiped right away or it will cover your pretty paint job TOO heavily. If you have lots of brush strokes on your painted surface, they will settle with stain and be more pronounced. It is up to you how aged you want the surface to look; you might sand a little more evenly (or not) before the stain goes on. I buffed the box with the damp paper towel, moving stain around, applying less or more as needed, and left it to dry for a couple of hours.

The Americana paint has a nice satin finish that will be great for cleaning ease, but the bare stained wood needs to be protected. Once this airs out I will give it a Satin clear coat for durability. I have a quart of Rustoleum polyurethane in the garage that needs a little me time.


What a fun project, Jenny! I love the ombré effect, and your use of stain too! Pinning!
Jenny! This is SO cute! I love the ombre effect you created with the stencil and paint. Great job!
This is such an amazing project and I love all the techniques you shared!
out goodwill never have prices that good! turned out great!! 🙂
Oh wow, our goodwill never has good stuff like this! I LOVE the makeover, I have to pin this for future reference!
That's SO pretty! I love the omber + wood effect. Also, your little girls standing there in the paint aisle? ADORBS!
Such a beautiful treatment on that box!
Oh. My. Goodness. This is absolutely beautiful! The ombre effect? The wood stain? The crazy adorable kids? You rock.
Thank You!
I almost didn't want to pay $3.99! I've been yardsaling all summer and now I want to get everything for a quarter, haha!
Your daughter is sooo lucky! Thank you for this very detailed tutorial. I just pinned it to try later.
Thank You!
This is so gorgeous! And I can't wait to see what you do with the tree stencil. As the mom of 2 teen girls, the photobombing will continue. It's both annoying and silly-fun. 🙂 Thanks for sharing at Inspire Us Thursday on Organized 31.
Thanks, Kelly!
Thank You! This was a fun project and I was able to finish it in one evening after the kids went to bed.
Thanks! My girls are so squirrely, but who can deny their smiling faces?
Thank you! I have a trifecta of thrift stores in my town. 3 of them on the same Blvd and two are right next door to eachother. It's a thrifter's dream!
Thanks, Beth! This was a fun project!
Thank You!I am pretty partial to those little girls.
Thanks, Keri! This one put me in the mood to stencil everything!