


October is the month for all things spooky, and this year I made a fun sign for the front yard. This was a super easy project that I made for FREE using scrap wood I had on hand along with paint and stain. I love those creepy old signs in every scary movie that always point to doom and gloom, but instead of your typical “Cemetery” or “Witch’s House” destination, I chose to go with a more familiar route:
Those scary movies we’ve all grown up with!
This was a fun challenge coming up with settings from some of mine and my kids’ favorite Halloween movies. I wanted my sign to be scary, but have a little nostalgia as well. I am a sucker for nostalgia, I tell ya! Not only did Pinterest have some great resources, but I was able to quickly locate popular and FREE fonts that went right along with these classic movies.
My niece Ashtyn and I were able to complete this project in one evening. We narrowed down our sign markers to display these great haunted sites:

1. Halloweentown- “The Nightmare Before Christmas.” This is my oldest daughter’s all-time favorite Halloween movie.
2. Hogwart’s- “Harry Potter.” Pick your favorite from the series.
3. Salem- “Hocus Pocus” Still one of my favorites. Sarah Jessica Parker looks so young in that movie.
4. Elm Street- “Nightmare on Elm Street” No way my kids are watching this movie…too scary! But my husband loved this one when he was younger. Sidenote: When our first daughter was born, I sang her the song that my mother used to sing to me and when my husband heard it, he was immediately creeped out and said it sounded like this:
Gives me “The Willies!” Needless to say, we learned a different song. I still won’t watch a Freddy Krueger movie to this day.
5. Sleepy Hollow- I just found that FOX has a new TV series called “Sleepy Hollow.” They are spinning their version of Ichabod Crane and the Headless Horsemen just in time for Halloween. I caught up on the first 3 episodes on Hulu while we were doing this project and I must say- I am sucked in!
DIY Yard Sign Tools and Supplies:
Jigsaw
Sander
Nailgun or Hammer and Nails
Wood Glue
Paintbrushes
Rags
Scrap wood. I used 1×4 scraps and 1×6 cedar fence scraps for the signs and a 2×2 scrap for the post.
Stain. I used Minwax Express Color in Onyx and Crimson.
Paint. My DecoArt Americana Multi-Surface Satin Paints came in handy here. They are suitable for the outdoors and there is still a great rebate going on for these awesome paints. Info HERE.
Stencils. DecoArt Stencils again! I used several from their new line of Mixed Media Stencils. I also used spray adhesive to help them hold still.
To begin, I picked out my titles and printed them out using Microsoft Publisher. You can do this on any word processing program and adjust the font size to fit your boards. I made the letters 3″ tall for the smaller boards and around 5″ tall for the larger sized boards.

I just loved how this was coming together!
I sketched out the edges of the boards for a little creative flair. I tried to personalize each board to make it stand out.

Cut out the edges with a jigsaw. Also cut the end of the post at an angle to help stake it in the ground.


Sanded everything nice and even.

Then I applied the stain. All the boards and the post received a coat of Black stain. This was a really fast process vs. painting with a brush. I used an old rag to wipe the stain on, and in one coat I had solid coverage.

Ever tried gel stain?
This was my first time using it and I have to say I was impressed! First, I have to tell where I got this stain.
One day, the stars aligned in the blogging world. I was over at Dana’s blog, Crafted Niche, reading about her awesome Tripod Lamp, and she just happened to be visiting my blog reading my Cooler Stand post and my lament (whining) over my local Lowes not carrying this awesome stain. While I was sending her an email regarding my case of lamp envy, she was simultaneously messaging me about the stain. She was such a dear and offered to send me some that she had left over in her goody stash. So in a matter of days, I had not one, but 4 bottles of this stain to try out! How cool is that?
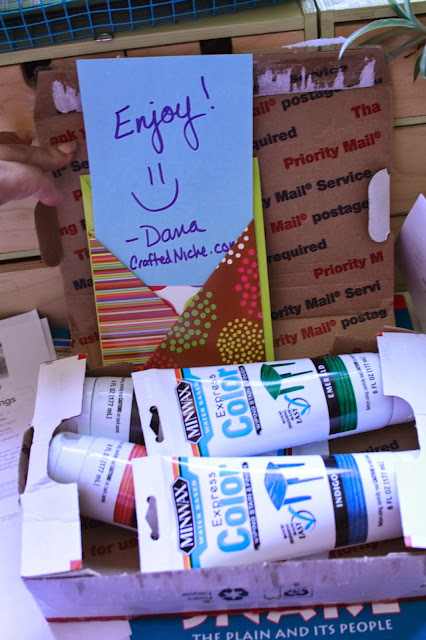
Dana rocks! Check her out:

This stain comes in wood tones, but the bright, rich colors are really what I was interested in. And they are perfect for a project just like this! They offer solid coverage with minimal effort and an easy clean up.
I used the Crimson stain for one of the boards and then gave it a slight rub with my black stain-covered rag for a little extra dimension.

Once all the boards were stained, it was time for the fun part. I got pulled out the stencils and got my creative juices flowing. Give ’em a spray with some spray adhesive to help hold them in place while you paint.

I added a houndstooth pattern in random spots on one board. A few varied stripes on another, and some arrows to the end of another.

Once I let the basecoat dry on all of the boards, I placed my printed letters over the top, taped them in place, and outlined them with a sharp ballpoint pen. Press hard! You want a nice indentation in the wood to follow for your paint.


The painting was the most labor-intensive part of the job, but like I said, this is what crafting is all about; just put on a movie and relax. This was a fun project to do with my niece and we were pretty proud of the end result. We chose bright, bold colors and it paid off. I could clearly see my sign from the street! Small artist brushes worked best here. I made more mistakes trying to use a large brush on the intricate detail work and all the words required two coats of paint to fully cover the black stain.
Adding some stripes to the post with painter’s tape:

We let the paint dry overnight, then laid out the boards the next morning. I used wood glue to adhere them to the post, then fired up the nailgun and used a few finish nails to tack them in place. I tilted some and nailed them in at different angles to add a little whimsy.

That’s it! After the hubs dug it in to the ground a bit, she was ready to spook the neighborhood.
This was such a quick and easy Halloween project. Perfect to do with a friend to get you into the spirit of things!

Here’s a quick list of other spooky movies I came up with. Which ones am I forgetting?
Camp Crystal Lake- “Jason”
Transylvania- “Dracula”
London- “An American Werewolf in London”
Pet Cemetery
Forks- “Twilight”
Underworld- “Beetlejuice”
Mockingbird Lane- “The Munsters”
Bates Motel
Overlook Hotel- “The Shining”
Green Town- “Something Wicked This Way Comes”
Burkittsville- “The Blair Witch Project”
Amityville- I can’t even read the word without getting creeped out!
Ask your family which spooky settings they remember most.
It’s bound to bring up some haunting memories. Bwahahahaha!
This week I have joined in with some great ladies to share a whole collection of Halloween crafts. After stopping here, go check out all of their projects. They are so crafty, it’s SCARY!

Sharing here:


Wow- how fun! I love that wood stain – I've never seen it before, I'll have to try it out! Pinned!
Brilliant idea!! Simply brilliant!
This project ROCKS!
This looks so cool! Great job. I'd love if you'd link up to The DIY'ers. http://homecomingmn.blogspot.com/2013/10/diyers-32-and-marathon-weekend.html
What a cool project! You always bring the creativity, lady. I love it!
Yes, this was a fun product to try out. It made the job go so much faster. Thanks for stopping by!
thanks, Kelly!
Thanks, Kayla! I missed this week, but I will try for next!
Thank You, Debbie!
Hi, Angie! Thanks for stopping by!
Awesome Sign!!! I love it!! new follower! <br />Kim
Just love the sign great for the front of the house since the front is bare (not enough leaves falling this year) before Halloween next year.