

*This post is sponsored. I have been compensated for my time and materials, but the ideas and clever quips are all mine.
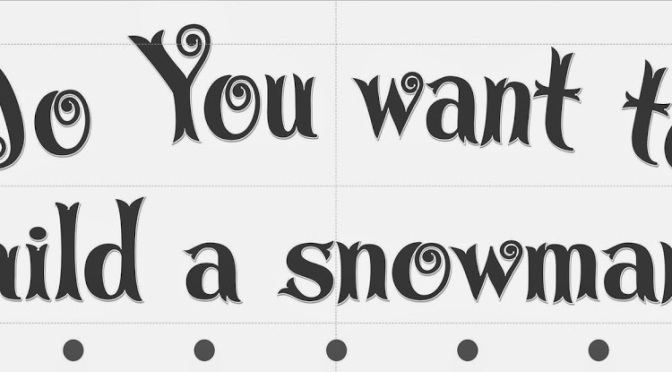
Hello, today I am sharing a great winter craft project featuring the title from the popular song “Do You Want to Build a Snowman?” from Disney’s movie “Frozen.”
So catchy, isn’t it? I have two little girls who are OBSESSED with all things “Frozen” right now, and I thought with the cold weather upon us, this would be a fun way to combine the two.
I am so excited to be working with Darice Crafts for this project! If you are in the Ohio, Pennsylvania, or Indiana area, look for this project coming to a Pat Catan’s store near you on December 1st!
I am so excited to be working with Darice Crafts for this project! If you are in the Ohio, Pennsylvania, or Indiana area, look for this project coming to a Pat Catan’s store near you on December 1st!

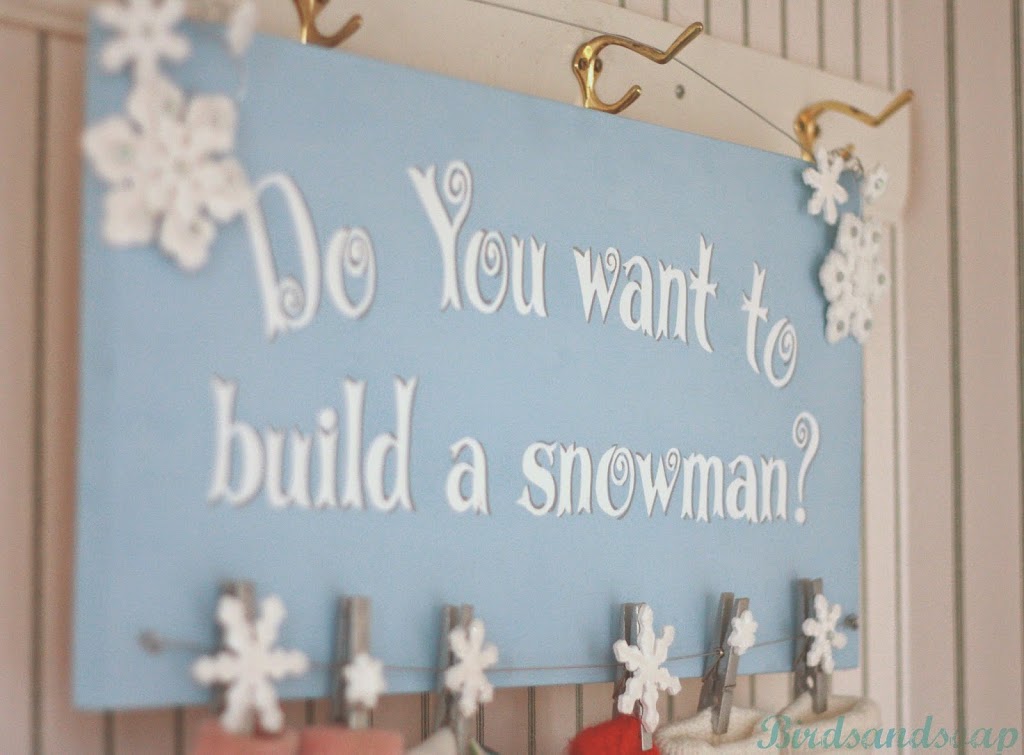
This wooden sign with hand-painted lettering is a fun place to clip mittens, hats, or other cold weather accessories for when the mood strikes to build a snowman. Not only does it look adorable, but it is functional as a drying line too. We received about six inches of snow already this week, so our little sign is getting a workout! I used simple wooden clothespins anchored to a wire attached with eye hooks on the front of the sign. Embellished snowflakes complete the winter theme. The free printable template is available below for making your very own sign!
Let’s get started!

You will need:
- DecoArt Crafter’s Acrylic Paint in Cool Blue and White
- Aleene’s Glitter Snow
- Aleene’s Tacky Glue
- Twinklets Diamond Dust Glitter
- Whispers Silver Metallic Embossing Powder
- Darice Craftwood 15 pack of Snowflakes
- Darice Craftwood 12pc. 8mmx20mm Metal Screw Eye hooks
- Darice Self-Stick Gems
- Silver Metallic paint pen
- Paint primer (I used what I had on hand)
- 6 Clothespins
- Galvanized Steel wire, I used 18 gauge size (found at Lowes).
- A 1×12” pine board measuring 24” long. I purchased my board at Lowes for around six dollars. It came in a four foot length, and I had it cut in half while I was in the store to save myself that step at home.
- Printable sign template. Click here for the link to print your own template.

Tools needed:
- Ruler
- Hot Glue Gun
- Pliers and wire cutters
- Embossing gun
- Extra-fine grit sandpaper (320 grit or higher)
- Tape
- Artist brushes in large wide bristle, small round tip, and small chisel tip.
Step 1:
To begin, I started by prepping my board. I lightly sanded the edges to remove any splinters and prepared the surface for paint. Then I sprayed on one coat of spray primer I had on hand.

After the primer has dried, apply the “Cool Blue” paint using a wide artist brush. Use 2-3 coats for even coverage.

Step 2:

With the base color finished, the board is ready for lettering.

Print off the free template, trim the seam where the two pieces of paper came together, align using the stars as a guide, and tape together. Tape your template over the board so that that graphic is horizontally centered, but vertically higher; about an inch from the top to allow space at the bottom for clothespins.
Step 3:
With the template taped firmly to the surface, use a ballpoint pen to carefully trace over the letters applying firm pressure.

Once all the letters have been traced, you can remove the template. Keep it for reference when adding shadows later on.

The pen leaves an indentation that will be your painting guide.
Step 4:

Using the white paint and small brush, begin filling in the letters of your sign. This will take 2-3 coats. I started with the chisel tip, filling in the wide sections of the letters, and finally switched to the fine round point brush to fill in the tight spaces. It will be less messy if you use a small brush and take your time vs. using a larger tipped brush trying to fill the letters in one sweep.

I found it helpful to go back with the blue paint and a fine tipped brush, painting around the letters and fixing any crooked lines and unevenness.
Step 5:

There will be brush strokes! Lightly sand over the board using a superfine grit sandpaper and even out any brush strokes or imperfections. Touch up with paint as needed for a smooth, even finish.
Step 6:

With the paper template as a reference point, use a silver metallic paint pen to follow the faint gray shadow lines that appear on the template. The shadows will add depth and make the lettering stand out. I think this is what really makes the sign pop! A spray sealer is a good idea here if you want your surface to hold up to grubby snowman-building hands.

Step 7:
Carefully take apart the wooden clothespins and set the springs aside. Using the same silver paint pen, color the entire clothespin. While the paint is still wet, sprinkle metallic silver embossing powder on the clothespin’s sides and front. I colored one piece at a time and sprinkled immediately after with embossing powder. Work over a scrap piece of paper to catch the remaining embossing powder and refill the container. When all of the clothespins are sprinkled, get out your embossing gun and let the magic begin! I just love embossing; such a cool transformation to watch.

Voila!

Reassemble the clothespins when they are cooled. With clothespins set aside, it’s time to decorate the snowflakes.
Step 8:

Begin by painting all of the wooden snowflake pieces with two coats of white paint. Don’t forget the edges!

When the paint has dried, you can apply Aleene’s glitter snow to add dimension and a little sparkle. I just used my finger to pounce and smooth a heavy layer on to each snowflake. Iridescent glitter is already mixed in to the product, making it just perfect for this project. It is light and fluffy and reminds me of the Pond’s Cold Cream that my grandma used to use. Set aside to dry.

Step 9:

Next, using Aleene’s Tacky Glue, make designs on each snowflake. I made a few with glitter just along the edges, while others were more ornate. Sprinkle Twinklets Diamond Dust over the top and watch them really sparkle!

Step 10:
Using the Tacky Glue again, adhere a small snowflake to each of the clothespins. Position them at different heights and rotate them at different angles for a more whimsical look. Set aside to dry.
Step 11:
Next, it is time to attach the hardware. Two screw eye hooks are placed at the top of the sign for hanging on the wall. I screwed them in about one inch from the edge of the board and centered them horizontally. Carefully turn them into place and make sure they are nice and tight. I was able to do this using just my hands, but you may need a pair of pliers to help here.

For the hooks that will anchor the drying line, I measured half an inch in from the edge of the board, and a full inch from the bottom of the board to place my hooks. Tighten them into place and they are ready for the wire attachment!
Step 12:
 Using a steel wire, I measured a piece about six inches longer than needed. Fold the wire about three inches from the end and run it through the eye hook. The short end of the wire is wrapped around the first screw eye two times, pulled tight with pliers, and then wrapped around the long wire two more times. Tighten to finish off. Trim the end of the wire with wire cutters keeping it close to the wrapped section and crimp any sharp part down.
String the clothespins onto the wire. Make sure to keep them all upright, facing forward, and run the wire through the springs.

When all of the pins are strung on and arranged how you want them, the end can be attached to the opposite hook. Pay attention to get the wire as tight as possible before finishing off.
Step 13:
Attach another long piece of wire to the top of the sign, leaving six to eight extra inches on each end. For this part, I pulled the wire semi-taught, secured it around the eyehooks with pliers as in step 13, then wrapped the remaining long ends around a pencil to create a spiral. Shape the wire, leaving a flat circle to attach a snowflake on the end.

After the wire hanger is complete, I used two more eight inch wire pieces looped through the eye hooks and shaped to attach snowflakes on each end.
Step 14:
Using a hot glue gun and hot glue, attach the remaining snowflakes to the ends of the wire and hold in place until cooled. I used the largest snowflakes here and layered them with smaller snowflakes for more dimension.

Step 15:
Finally, add some self-stick Gems to your sign for a little bling. I attached mine to the center and points of the snowflakes. You are done!

Do you love it? I do! I can’t help but start singing every time I walk by and read the sign! Thanks for stopping by, and Thanks to Darice Crafts for working with me on this project!


Oh my gosh! that is such a super sweet Frozen Inspired project. Who wouldn't want to "build a snowman"? You did a beautiful job on your sign.<br /><br />gail
Thanks very much, Gail!
This could not be cuter – great tutorial, too!!
Thank You, Keri!
This is so cute-it turned out perfectly!
This is so super cute! Love!!!
So absolutely adorable! My boys are huge fans of that movie too!